I got quite a few emails from Studio 5 viewers about my segment on Friday, so I thought I would post a few more details to help all of you out!
Antique Hangers – I ordered the hangers from http://www.rubyplaza.com/shop/itsnotaboutneed. (Also a new sponsor on my blog, so be sure to check out all their great antiques!) They have lots of great items to display in your home. I thought of using some of those beautiful antique pictures of my ancestors to place in my office. A great way to remind me of my heritage, and to use photos that might just be sitting in a box collecting dust.
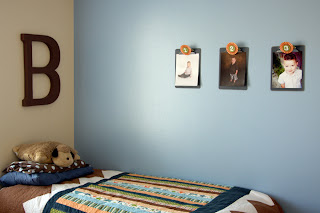
Clipboards – Make a collage of clipboards on your
wall to show miscellaneous pictures. I chose to take clipboards and display
pictures of my son. One clipboard / picture for every year of his life. Then
decorated it with some cute accordion circles made out of scrapbook paper. Click here for a turtorial on YouTube for how to make these cute circle accordion circles!
Curtains – Often we take pictures of us eating our favorite
food, a cuisine we were proud to say we made, or enjoying food together. Create
a small window curtain collage using small pictures (2” x 2”) and stacks of
paper cut out in circles then folded to create a 3-D effect. Use your
sewing machine to sew them all together. (Watch the video segment to see more how to do this!) I did sew in the middle of each picture. Then simply attach each string of pictures and paper circles with curtain
hangers to a rod. All the pictures are of us either enjoying food
together, or some pictures of food we love! Perfect curtains for any kitchen!
Coloring Book Pages There are two ways of doing this. You can
go to Crayola.com (http://www.crayola.com/play-zone/play.cfm?siteID=1&appID=1
- /COL) and create coloring pages using their automatic uploader. Simply
upload a photo of your choice and let them do the creating. You will need a
code inside a box of 48 crayons or more to create you picture. (Watch the segment to see how to do this as well!)
The second way is in Photoshop. Go to this link to see
instructions of how to do this!
http://content.photojojo.com/diy/how-to-create-coloring-book-using-photos/
Games – Many ideas online have been shown to do memory
games, playing cards, etc using photos which make your games more personal.
This game was one that was unique to me that I found online and just thought
was so fun. I loved the game Guess Who growing up, so I just replaced those
silly pictures with 24 pictures of cousins, grandma, & grandpa in my
family. What a great way to learn more things about cousins you might not know
so well! I did have questions of how big the pictures needed to be.
My photos were 1 2/8" x 1 3/8". However, I would suggest taking a ruler and measuring your game just in case. There has been many "versions" throughout the years. I resized the photos in photoshop and printed them out on my photo printer. Hopefully a little tutorial of how to do this in the future!
Quiet book – There are thousands of ideas for quiet books online, however I have found that many of them tend to be pretty bulky to put into my purse. This quiet book I made from a simple jewelry gift box. I made an accordion with scrapbook paper, then attached my pictures to it. I adhered each side of the accordion to the base and lid. My inspiration was "Brown paper packages tied up with string, these are a few of my favorite things"! So it is a brown box and all the things inside are of my son’s favorite things.
Again, if you have any questions in regard to any of these projects, please feel free to email me, or leave a comment!
Thanks
M


1 comment:
Very nice, thanks for sharing.
Post a Comment