A few weeks ago I posted this on my Instagram account ... and there response left me SPEECHLESS!
I can't believe how many people have contacted me to get the recipe and how to, so they could do this for their Valentine.
I apologize that it has taken me so long to get this up ... however sick kids have been my excuse :)
So drumroll please .....
First off for the recipe
It makes 12 heart cake-lett's
(you might want to double it ... see pan sizes below recipes in the TIPS section)
1 cup sugar
1/2 cup canola oil
1 egg
1/2 cup buttermilk
1 tsp vanilla
1 oz red food coloring (1/2 bottle)
1/2 tsp white distilled vinegar
1/4 cup prepared hot cocoa with water
(coffee can also be substituted)
1 cup flour
1/2 tsp baking powder
1/2 tsp baking soda
1/2 tsp salt
1 Tbsp unsweetened cocoa
1. Preheat oven to 325 degrees.
2. Combine sugar and oil in large bowl.
3. Mix in eggs, buttermilk, vanilla, & food coloring.
4. Stir in vineger, & hot cocoa.
5. In a separate bowl, mix together flour, baking powder, baking soda, salt, & cocoa.
6. Add dry ingredients slowly into wet ingredients, and mix just until combined.
7. Generously grease (Crisco) and flour (1) half-sized cookie sheet pans. (Clarification below)
Line the bottom with parchment paper.
8. Pour batter into pan.
9. Bake for 30-35 minutes on middle rack, until toothpick comes out clean. Don't overbake!
10. Let cool in pan on a cooling rack.
11. When completely cool, dump out onto a cutting board lined with plastic wrap. Peel off the parchment paper off the top.
12. Cover the cake with another piece of plastic wrap and place in freezer overnight.
(the rest of the instructions are below frosting recipe)
MAKE FROSTING NOW!
Usually, you wouldn't want to put your frosting in the fridge, but this frosting is the exception!
It is a Whipped cream cheese frosting!
FROSTING RECIPE:
4 oz cream cheese, room temperature
3/4 cup powdered sugar
1/4 tsp vanilla
1/4 cup whipping cream
1. Whip cream cheese until smooth.
2. In a separate bowl whip the whipping cream (whip it good)!
3. Add powdered sugar and vanilla to cream cheese and combine until smooth. Then add whipping cream last and whip just until combined.
4. Put inside pastry bag (with a start tip) and place inside fridge overnight. (look for a great tip below)
Back to you with the instructions of how to make the hearts!
13. After the cake has been frozen, remove the top layer of plastic wrap and use a darling heart cookie cutter (yes, the same one you use for sugar cookies) and cut 12 hearts! Remove the negative space cake ... and look below in Tips with what to do with it. DON'T throw it away, you wasteful person ... lol!
They are now ready to frost!
I use a star tip, and start frosting on the upper left corner. Then zig-zag diagonally until you get to the bottom and make a little circle to cut off the frosting, like so:
Aren't they just DARLING!
I can promise, they aren't as hard as you might think they are ... and don't let the overnight scare you off. If you ask me, it makes it easier when getting ready to serve them, because you are already cleaned up and ready to go. Here are a few tips and pictures to help you understand the recipe:
Tip no. 1 | My favorite pan is a 13" x 9.5" x 1" pan. You can find them at Orson Gygi here
For 12 hearts, this is the pan you will need!
For a FULL pan(18"x13"x1") or two smaller pans, you will need to DOUBLE this recipe!
**This recipe I used two smaller pans because it was easier to get them into my freezer and to dump them out onto my cutting board.
Tip no. 2 | Why does the recipe say Hot Cocoa and Coffee can be substituted?
Well on the original recipe it tells to use Coffee ... but because I am a Mormon, and because I don't think that Coffee is the best ingredient for me to use for my family ... I decided to try the Hot Cocoa. Surprising, out of the taste testers I chose, (Thanks Kindred family) it was 4 people to 1 in favor of the Hot cocoa! So, this is my new twist on the recipe, however both taste wonderful!
Tip no. 3 | The frosting might appear to be a little more runny to the usual cream cheese frosting you're used to. That is why I highly recommend that you make it and put it in the refrigerator at the same time you put the cake in the freezer. Trust me! You'll be glad you did!
I learned a little trick years ago, that has saved me from trying to clean out those pastry bags! (It still gets a little frosting on the bottom, but not nearly as bad as putting the frosting directly in the bag.
I prefer to use Press and Seal Plastic wrap. Put a long piece on the counter, Place the frosting on the plastic wrap. Then roll it up and "wring" both ends. Then place it in your pastry bag.
IT WILL CHANGE YOUR LIFE!!
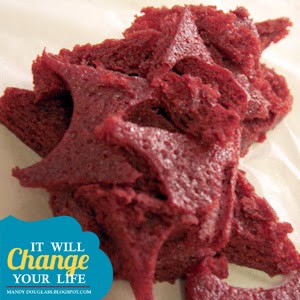
Tip no. 4 | What do you do with all the left over scraps!
That cake is way too good to just throw away!
How about trying this?
or I saw this on Pinterest ...
Found at http://www.dessertfortwo.com
but haven't had a chance to try it!
Feel free to email me with your questions ... and I hope your Valentine just LOVES these cake-letts!


1 comment:
I've never had red velvet cake before, for some reason it's freaked me out! lol, I don't know why. But yous sounds so delicious!!! I've gotta give it a try, thanks for the recipe :)
Post a Comment